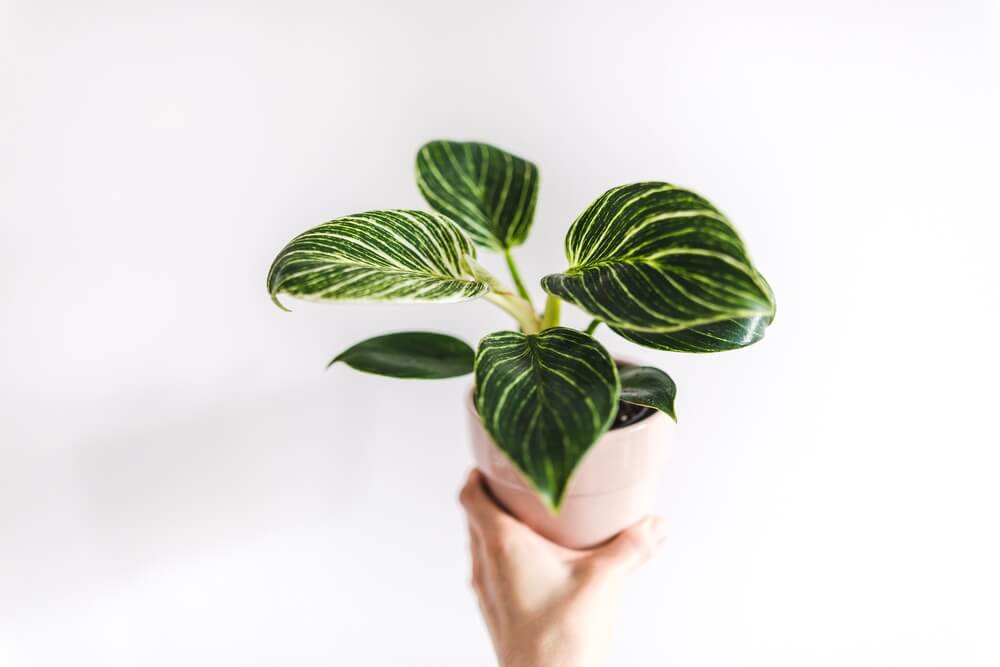
The stunning Philodendron Birkin is a unique tropical plant with large, glossy heart shaped leaves. You can identify a P. Birkin from other philodendrons by its dark green forest colored leaves that are thinly striped with creamy white lines. Caring for a Philodendron Birkin is relatively easy and is a great plant for beginner plant parents!
This post will walk you through all the ins and outs of Philodendron Birkin care. We will talk about watering, what kind of light it needs, how to propagate a Philodendron Birkin and more!
Table of contents
Quick Facts

- Common Name: Philodendron ‘White Wave’
- Scientific Name: Philodendron Birkin
- Mature Size: 3 feet tall and 3 feet wide
- Sunlight: bright, indirect/filtered sunlight
- Water: Moist (not wet/oversaturated) soil; water when top 1 inch of soil is dry
- Temperature: 65-75F with 60%+ humidity
- Soil: Well draining, arid soil that holds on to moisture
- Hardiness Zone: 9-11
- Propagation: stem cuttings and new offsets
The Philodendron Birkin, which is its scientific (and most popular) name, is a variegated, newer cultivar of the well known Philodendron Rojo Congo. P. Birkin actually does not occur naturally in nature. This plant came about as a random, rare mutation in the P. Rojo Congo which, oddly enough, has leaves with dark green on the top and a rich, deep red underneath. This mutation somehow brought about the stunning green and creamy white variegation seen in the P. Birkin.

This mutation is not only rare but also “unstable”. This means that there is a chance that your Philodendron Birkin could actually revert back to its more stable states. In this case, you would see leaves actually change color to that of a P. Rojo Congo.
It isn’t common to see a Philodendron Birkin revert back to its more stable form. However, should this happen, cut away all of the changed leaves so there are only the variegated leaves distinctive to the mutated P. Birkin. This can encourage the plant to regrow leaves with the variegated mutation.
Growth Pattern and Habits
To provide the best care for your Philodendron Birkin, you should know the details on how this plant grows. It is a slow grower, growing at best 4 inches during the spring and summer growing season. A mature Philodendron Birkin, when grown indoors, usually reaches a size of approximately three feet tall and three feet wide.

This type of philodendron is not a climbing vine but is self heading. This means that the leaves grow tightly together from a central hidden stem and are able to support themselves without attaching to surrounding structures. Due to this growing pattern, expect your P. Birkin to grow compact.
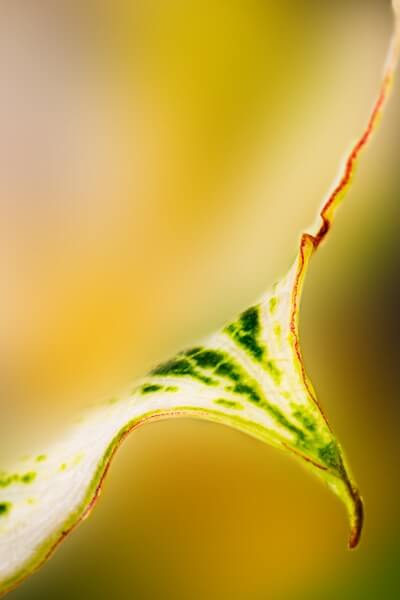
Leaves grow atop thick, fleshy stems. New leaves appear from the center most aspect of the plant and unfurl to reveal a faded, lighter version of the mature Philodendron Birkin leaves. As the leaves age, the green and cream become darker and bolder. The oldest leaves will begin to lose their variegation and turn a dark green.
Because Philodendron Birkin is a slow grower, it is not necessary to replant any more frequently than every two years. It is still important to refresh the soil once your Philodendron Birkin is full sized, as this replenishes important nutrients it needs to stay healthy.
Sunlight
Philodendrons hail from tropical jungles and receive indirect, dappled light that makes its way through the tree canopy. Philodendron Birkin is not different. Philodendron Birkin’s light requirements as an indoor plant should mimic this natural environment, so keep this in mind when caring for yours!

P. Birkins thrive in bright rooms that stay bright throughout the majority of the day. Bright light, however, does not mean direct sunlight. In fact, too much direct light is detrimental to its growth.
To meet your Philodendron Birkin’s light requirements, choose from the following places in your house:
- Directly in front of an eastern facing window in a room that is bright all day. Direct, morning sunlight for two to four hours is ok and well tolerated.
- A couple of feet away from a south facing window, just outside of the direct sun rays. Be sure that the plant will not receive direct light, especially during mid afternoon when the rays are strongest.
- If you don’t have any bright rooms, you can supplement natural light with a grow light that is 15,000-20,000 lux
- If you want to put your Philodendron Birkin in a room that only receives direct sunlight a majority of the day, consider placing a sheer curtain over the window to decrease the sun’s intensity.
Water
Philodendron Birkin likes consistently moist soil. This can be tricky because you don’t want to overwater and cause root rot but you also want to provide enough water so the plant will stay healthy!

I water my Philodendron Birkin using this rule: only water when the top inch of soil is dry. When watering your Philodendron Birkin, water it in the sink or in a shallow tub. Completely soak the soil until water begins to drain out of the pots drainage hole. Allow the plant to sit in the sink or tub until the excess water stops, then you can move your P. Birkin back to its usual home!
Soil
The best soil for a Philodendron Birkin is a mixture that encourages adequate drainage and is light and airy but can stay moist. A great homemade mix can be made from equal parts of the following:
- Organic potting soil or worm castings
- Perlite
- Peat moss
The potting soil, or worm castings if you choose, is what provides the much needed nutrients the plant needs to grow. Because Philodendron Birkins grow slowly, you will likely not need to repot this plant more often than every two years. To ensure that your plant continues to receive adequate nutrients, fertilize (as we will talk about a little later on) and replace the top two to three inches of soil with new potting soil yearly.

Perlite is an additive made from volcanic glass. It is used in soil mixtures to promote drainage and prevent soil compaction. It allows the soil to stay airy and prevent water from suffocating a plant’s roots.
Peat moss, also referred to as sphagnum, is an absorbent moss that retains moisture in pockets throughout your soil. Because of its spongy nature, it doesn’t hold onto excess water and promotes an arid soil mixture.
Temperature and Humidity
Philodendrons hail from the warm, humid jungles of South America, and to give your Philodendron Birkin the most optimal care, you will want to try and mimic this environment as much as you can.
The P. Birkin likes to be in temperatures from 65F-85F. If you have an indoor Philodendron Birkin, please don’t turn your house into a greenhouse; it will do just fine in temperatures that are comfortable for humans. That being said, do avoid placing over air vents, especially in the summer when the AC is running. On the flip side, during the winter, make sure your Philodendron Birkin isn’t close to cold, drafty windows.

P. Birkin’s like it humid! If you have a bathroom that meets a Philodendron Birkin’s light requirements, this would be a great place to display your plant! If you have a bathroom with low light but like the idea of having your plant in this area, try adding a grow light!
You can also use a pebble tray to increase the humidity around a P. Birkin. Fill a shallow tray with small, uniform pebbles. Add water and place your potted plant on top. The evaporating water from the pebble tray will create a small, humid environment around the plant!
Small desktop humidifiers do a great job as well. Be sure to keep the humidifier clean and the water fresh to avoid causing issues with your plants.
Fertilization
To provide the best Philodendron Birkin care, you need to give it nutrients during the growing season. It’s a great idea to fertilize your Philodendron Birkin during the spring and summer months, which is the active growing season. Do not fertilize in the fall or winter months.
When choosing a fertilizer, look for one that is water soluble and has equal parts N-P-K. These letters stand for the main macronutrients a plant needs; nitrogen, phosphorus and potassium. Philodendron Birkin also likes the additional micronutrients, calcium and magnesium so take a close look at the fertilizer you buy.

Fertilizers will have numbers on the front indicating the amounts of nitrogen, phosphorus and potassium in the solution. It may read 2-5-7, which indicates that these three elements are not balanced. For Philodendron Birkin fertilizer, you want the box to read 5-5-5.
Dilute fertilizer in water as instructed on the box. Fertilize once a month through the spring and summer.
If you notice that your Philodendron Birkin’s leaves are browning or are beginning to curl, one of the reasons could be too much fertilization. If you have been a bit heavy handed with fertilizing or fertilizing too frequently, consider taking the plant out of the pot and rinsing the roots. Replant in fresh soil.
Propagation
The two reliable ways to propagate a Philodendron Birkin are via stem cuttings and dividing offsets. When propagating via stem cutting, you will first obtain a stem cutting, place it in water to allow new roots to develop and then transplant into new soil after approximately four weeks or when the roots are at least two inch long. If you are using an offset to propagate your Philodendron Birkin, you will transplant the new plant directly into soil!
Stem Cuttings
- Choose a mature stem with a healthy color and supple leaf or leaves! This will give you the best chance of success.
- Examine the stem and look for nodes. Nodes are areas along the stem from which leaves grow. They appear as little bulges along the stem.

- Using a clean, sharp knife to make a clean cut one inch below the lowest node.
- Place your stem cutting in a clear glass container, like a mason jar or a small beaker.
- Make sure the water is just barely covering the bottom of the stem and that no existing leaves are touching that water. If they are, they will quickly rot.
- Change out the water every three to five days or sooner if you notice the water is getting murky.
- Roots will begin to appear within four to five weeks. Once they are approximately two inches long, transplant the newly rooted cutting into fresh soil. Do not water the new plant for two days, as this allows all vulnerable areas of the stem to callous over.
- Start Philodendron Birkin care as normal!
Offset Division
- Pups or offsets are actually new baby plants that appear at the base of the mature plant. It is important to identify and use an offset that is well established.
- Gently move the soil away from the new pup.
- Separate the pup’s roots from the mature Philodendron Birkin’s roots; you can usually do this with your hands, however if the roots are extremely tangled, use a pair of sterile scissors to avoid too much tugging.
- Plant the new pup in fresh soil. Do no water for the first two days.
- After the initial two days, keep the soil moist by misting the base of the plant daily for the next two weeks to allow the roots to establish. At this point, you can begin to care for your new Philodendron Birkin as you would a mature plant.
Common Problems
Yellow Leaves
Yellow leaves on a Philodendron Birkin are a telltale sign of overwatering. Remember that this plant enjoys a moist environment but should not sit in soggy soil that is oversaturated. This can be a fine line to navigate however using well aerated soil and terracotta pots with a drainage hole can help prevent overwatering from becoming an issue.
Old leaves can also turn yellow and this is normal. Yellowing leaves due to old age will only occur in a healthy plant to the bottom-most leaves. These are the oldest leaves. Yellow leaves that are scattered throughout the plant are cause for worry.
Brown Leaf Tips and Edges
This issue points to underwatering and low humidity. Don’t allow your Philodendron Birkin’s soil to dry out too much. It’s time to water when the top one inch of soil is completely dry. If you notice brown edges, the environment around your plant may not be humid enough. In this case, try adding a pebble tray or a small humidifier.
Thrips
Thrips are a small winged insect that can cause issues. This pest feeds by sucking the nutrients out of plant tissue. You will notice a freckle-like discoloration on your Philodendron Birkin’s leaves.
To treat a thrip infestation, first remove all heavily infected leaves. Then gently spray the plant’s leaves and stems with a garden hose or shower head. Follow this by spraying your
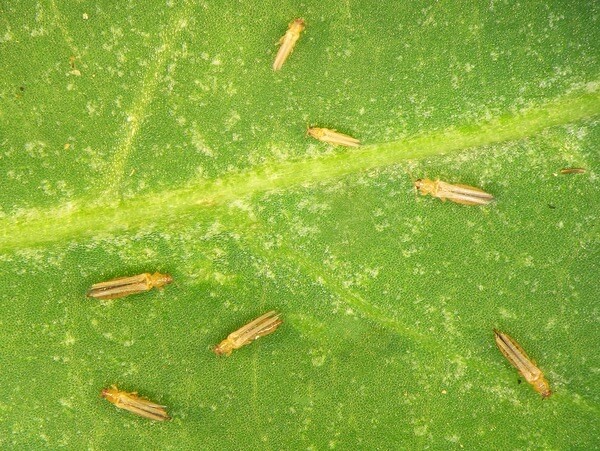
P. Birkin with insecticidal soap. The soap will kill the adult thrips, however will not harm any of the eggs as these are actually laid within the plant’s tissues. Another way to catch the adult thrips is by using a sticky insect trap.
To ensure that the eggs have been killed, use a systemic insecticide that is applied to the soil. This will be absorbed by the plant and damage the eggs.
Spider Mites
Spider mites are another pest that can infest and wreak havoc on your Philodendron Birkin. If you notice there are fine, white webs throughout your plant, then you have a spider mite problem on your hands.
Remove all webs and obvious spider mites with an alcohol soaked paper towel. I then like to follow this up by misting the entire plant with rubbing alcohol twice a week until all signs of the insects are gone.
Toxicity
Like all philodendrons, Philodendron Birkin is toxic to pets because it contains crystals of calcium oxalate. If you notice your pet drooling excessively or vomiting, please reach out to your emergency vet for treatment!
Summary
The Philodendron Birkin is a fascinating plant that came about due to a random mutation of another type of philodendron. This plant likes moist soil and humid environments, just like the tropical rainforests of Brazil. Keep your P. Birkin happy in bright, indirect sunlight and you will be rewarded with spectacularly vibrant green and white striped leaves. You now know how to propagate your Philodendron Birkin so you can multiply the number of eye-catching plants in your collection.


