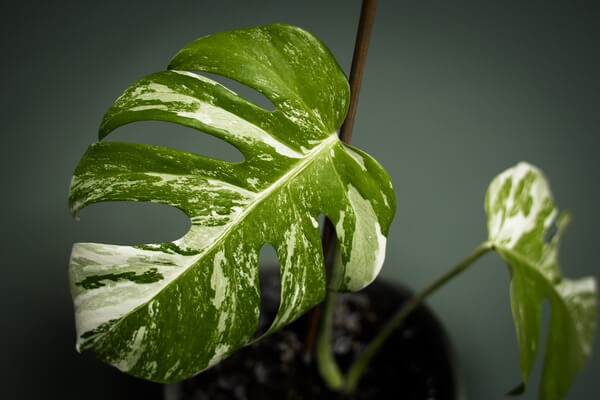
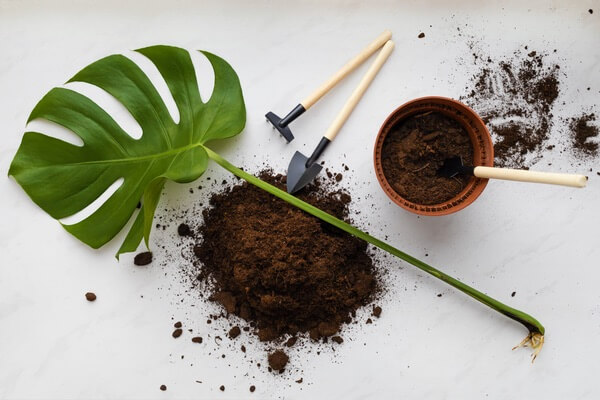
You have definitely seen the marvelous Monstera deliciosa plant, even if you do not know it by name. It is the tropical, evergreen-colored plant that has holey leaves, giving it the nickname “Swiss Cheese Plant”! This wonderfully easy-to-care-for tropical plant has become a lush, ornamental household staple that can be found at just about any plant or garden store.
This guide on Monstera deliciosa care will help give you the confidence to buy and grow your very own.
Table of contents
Quick Care Guide

- Mature Size: 10-12 feet tall indoors; leaves up to 2 feet wide
- Sunlight: Bright, filtered light
- Water: Moist (not wet/oversaturated) soil; water when top 2 inches are dry
- Soil: Well draining soil that holds on to moisture
- Temperature: 68°F to 85°F is ideal; humidity
- Hardiness Zone: 10-12
- Propagation: Cuttings
So what exactly makes a Monstera deliciosa so special besides their unique look? They are part of the Araceae family and grow native to the tropical areas in southern Mexico down through Central America.
M. deliciosa is a hemiepiphyte. This word describes the plant’s growth habit. A baby Monstera deliciosa’s growth begins in the soil. As the plant matures, it reaches out to the surrounding trees, latching on with aerial roots and begins to grow upward, similar to a vine. These aerial roots draw water and nutrients from the host plant, to allow the M. deliciosa to grow higher and higher off the jungle floor towards the sun. Unlike many epiphytes, the M. deliciosa does not kill the host plant!
Their distinctive leaves do more than add a little bit of tropical oomph to your living room. The holes and slits allow light to pass all the way down to the lower leaves of the plants. They also allow the Monstera deliciosa to withstand the heavy winds and torrential rains of their tropical homes
Monstera deliciosa produces edible fruit. While your housebound M. deliciosa will most likely never bear fruit, those in the wild do and the taste is incredible. Think fruit salad. The taste is a mix of strawberries, pineapple, passion fruit and mango.

Now let’s get to the good stuff! Keep on reading to learn about how to take care of your own Monstera deliciosa.
Sunlight
A Monstera deliciosa does best in bright, indirect or bright, filtered light. This mimics the intensity of light it would receive in nature.
What does this type of light look like indoors? This level of light is best achieved in a room with a lot of windows, where it stays bright for a majority of the day. Place your M. deliciosa in an area of this room that never receives the direct rays of the sun. If this is not possible, make sure that your windows have sheer coverings to filter and soften the harshness of the sun.
Long or consistent exposure to direct sunlight can cause your Monstera deliciosa’s leaves to scorch and burn. Too much light is one of the reasons why you might notice yellowing, crispy leaves. If you do, move that baby to a new location with more optimal light!
Water
While water requirements might seem like the hardest part of Monstera deliciosa care, with the right technique and soil, it is actually quite simple. We will discuss the best soil in the next section so for now, let’s just talk about water!

An M. deliciosa thrives in a moist, not soggy, environment, as this plant is sensitive to overwatering. To achieve this, water thoroughly only when the top 2-3 inches of the soil are dry. In most situations, this equates to watering every 10-14 days.
However, depending on where you live, this range will differ depending on the overall humidity in your area.
Speaking of humidity, your Monstera deliciosa will gladly welcome a weekly spritz. This is especially important if you live in a low-humidity environment. It is best to use a mister that has a fine spray. Mist in the morning to allow for adequate evaporation throughout the day.
Last little tip when it comes to watering. Use room-temperature, filtered or distilled water when watering your Monstera deliciosa. If filtered water isn’t available, fill up a watering container with tap water the night before. Let the water sit overnight to allow the chemicals to evaporate before using.
Soil
The soil that will make your Monstera deliciosa happiest is one that is well-draining but can hold onto moisture. Yes, that sounds like an oxymoron but trust me, it is attainable.

What you are looking for is a soil that has a mixture of components with the following characteristics and a pH between 5.0-6.8.
- Sphagnum peat moss and coconut coir are two important ingredients that retain moisture and nutrients without becoming soggy. They also give structure to the soil so it doesn’t become compacted around the roots.
- Pine needles add extra aeration due to their high levels of lignin, which is a structural material found in plants that provide rigidity and durability. This adds additional support to the soil and allows roots to spread.
- Perlite, a natural occurring volcanic material, provides drainage to prevent water build-up near the roots.
- Organic material supplies nutrients essential for growth.
Let’s discuss the two store bought soil’s that I really like to use!
The first is Foxfarm Ocean Forest Potting Soil. Bags can be found at big home improvement stores like Home Depot and Lowes or can be bought through Amazon. It contains sphagnum peat moss, forest humus (compost) and organic material to add nutrients. For extra drainage and structural support I add 1 part perlite to 3 parts Foxfarm Soil.

Another good option is Burpee’s Natural and Organic GardenCoir. Just like Foxfarm’s soil, it can also be widely found at garden and home improvement stores as well as Amazon. This organic soil is made from coconut husks which provides excellent aeration. It does lack added nutrients so be sure to do the following:
- 2 parts GardenCoir with 1 part potting soil (this provides the nutrients plants need); then combine this mixture (3 parts) with perlite (1 part)
Temperature
M. deliciosa does best in temperatures ranging from 60°F-80°F. Given that most people keep their house within this range all year round there shouldn’t be many issues with growing inside.
Avoid placing over vents to avoid over-chilling with air conditioning and overheating when the furnace is on. Keeping your plant well away from vents also prevents the soil from drying out too quickly and leaves from cracking.
Fertilizing
It is best to fertilize Monstera deliciosas during the growing season, which begins in the spring and continues through the summer. Nitrogen, phosphorus and potassium are the “active” components of fertilizers and are essential to plant growth.

Look for a fertilizer with the following nitrogen-phosphorus-potassium ratio; 3-1-2.
I recommend fertilizing just once per month from April to September. You must dilute your fertilizer in water before fertilizing your Monstera deliciosa. Add 1-2 teaspoons of fertilizer per gallon of water for best results.
Propagation
Monsteras propagate readily and easily via stem cuttings. Because M. deliciosas has a fast growth rate of 1-2 feet per year, you will need to prune frequently which will provide you with ample amounts of cuttings.
When taking a stem cutting, you are looking to cut just below a leaf node. Nodes are easily identified on a plant’s stem. They are small areas along the length of a stem that are slightly wider than the stem (nodes look like small bumps) from which new leaves will emerge.

Learning how to propagate Monstera deliciosa is easy. All you have to do is follow the steps below:
- Use a sharp, clean knife to make the cut just below the node. Depending on how many cuttings you want to propagate, you may take multiple cuts from just one stem.
- Allow the bases of each cutting to dry out. I leave my new cuttings on a dry paper towel overnight.
- Once dried, place your cuttings in a glass vase or cup. Fill the cup with just enough water to cover the ends of the cuttings.
- Place your cuttings in an area of your house that receives bright, but filtered or indirect light (just like a mature Monstera).
- Be sure to change the water every 3-4 days
You will start to see new roots grow from the base of your cuttings in 2-3 weeks! At this point you can either choose to transfer your new baby plants into soil or, if you like this aesthetic, keep the plants in water indefinitely.
The former option is ultimately less work. Transfer each new baby Monstera deliciosa in a new, clean pot with fresh soil. Place the plant in 3-4 inches of new soil and gently cover, being careful not to compact the soil tightly around the roots. At this point you will focus on proper watering technique and sun exposure.
The latter is more tedious but produces just as fabulous of results. If you keep your new baby M. deliciosa in a vase with water, continue to change the water every 3-4 days for the entire time you decide to keep your plant in this medium. Fresh water is vital to keeping your plant healthy (and keep the vase clean and nice to look at!).

Tips and Tricks
- Get a moss pole! Monstera deliciosas are climbing plants so in order to let them shine and grow their best, they need something to attach to! Moss poles will allow your M. deliciosa to continue growing strong without becoming top heavy which leads to stem breakage.
Insert the moss pole in the center of your pot and push it all the way through the soil to the bottom.
- “Train” your plant to grow vertically up the moss pole by using plant ties to tie the stems to the pole. Once this is done, nature takes over. Aerial roots will grow into the moss pole to provide support to the plant.
Expect to do this 2-3 times a year as new growth emerges.
- Because the M. deliciosa is a tropical plant, it loves humidity. It would go perfect in a sunny bathroom. If you don’t have this, try misting the leaves regularly. You can also create a humid environment with a pebble tray. Fill a 2 inch deep water tray halfway with medium sized pebbles and then add water to the pebble line. Place your potted Monstera on top of the pebbles to create a humid environment through slow evaporation.
- Clean the leaves weekly! Dust loves to accumulate and settle on these large leaves much quicker than you would think. Gently wipe the leaves with a damp paper towel soaked in warm water.
- If you notice that part of a leaf is beginning to brown, do not panic. If you are watering your plant correctly and have it in an area that gets indirect light, it is most likely just the expected life cycle of the plant. To keep your plant looking its very best, you can use sharp, clean scissors to cut away the brown area, making cuts that mimic the natural contours of the leaf.


